
 When the days are shortest, candle light offers cosiness and comfort. Even better is the golden light of lanterns. For this year’s Christmas Season I have created several designs for lovely paper lanterns. They are all inspired by the Regency Period.
Actually, transparent lamps, candle shades, lanterns, and fire screens were very popular during the Regency period. They were called transparencies. As lanterns and candle shades they were e.g. fixed on the supper table.
Transparencies during the Regency Period
Transparencies were made of thin painted paper or cloth. The translucent effect was achieved by mixing the colours with mastic varnish or burnt lined oil, and by applying a touch of spirit of turpentine to all things on the picture that should glow especially light, e.g. the moon, a fire, and illuminated windows. Popular ground colours were Prussian blue, Burnt Sienna, Verdigris and Ivory Black.
One of the first books to describe the making of transparencies was “The Artist’s repository; or, Encyclopedia of the fine arts” by engraver Charles Taylor. Publisher Rudolph Ackermann, and his chief rival Edward Orme, printseller to King George III., brought transparencies into fashion. They both sold series of prints that could be coloured and turned into transparencies. They directed their products at female customers, as ladies had become interested in water-colour painting.
Transparencies proved a DYI-hit with genteel ladies. Read more about it – e.g. how Jane Austen described transparencies in one of her novels – in the fascinating post “Decorating with Light in Napoleonic Times” by the acclaimed author Shannon Selin.
Making paper lanterns
Check out my designs and even try your hand at paper lantern design yourself.
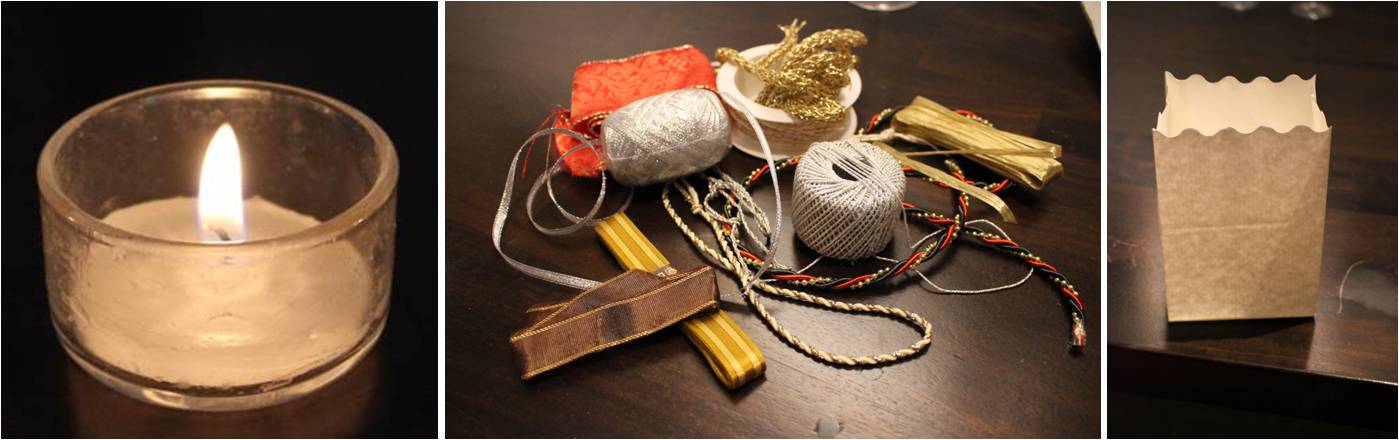
This is what you need:
- blank paper lanterns
- matchboxes
- paper napkins with festive motive
- lace and ribbons
- pictures of your favourite historical persons and places, or a silhouette, etc.
- glue and scissors
- olive oil
- candles
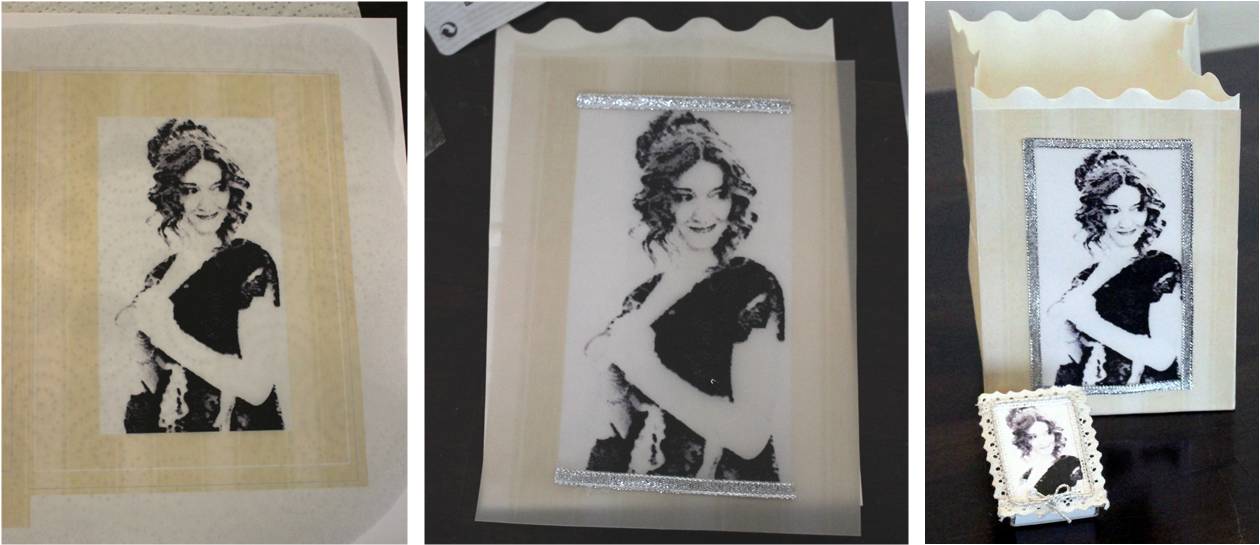
Prepare the pictures
Select pictures of your favourite historical Regency persons and places. Edit them to a size fitting well on your paper lanterns and matchboxes. Print them on average or thin copy paper.
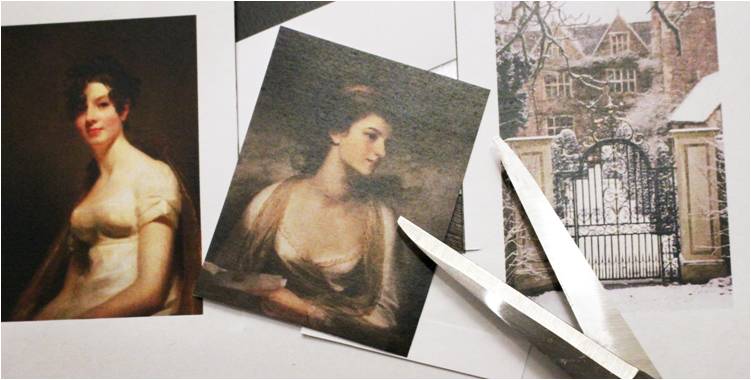
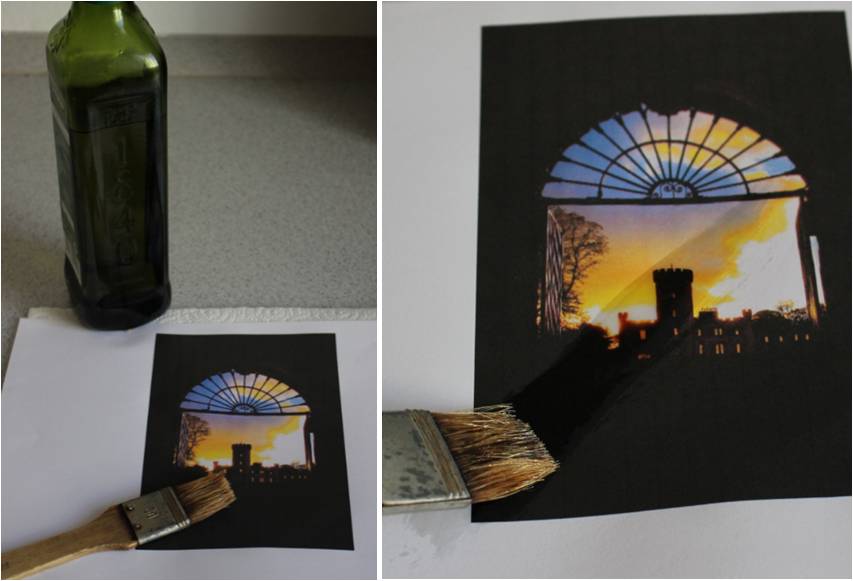
The pictures for the lanterns need to undergo a special treatment to make the paper seem translucent. In the 18th century, they applied varnish or and spirit of turpentine. I have found out that olive oil works fine, too. To do so, place the pictures on a tissue und apply a thin layer of oil with a brush. Remove the surplus oil with a tissue. Let the pictures dry over night.
Decorate the paper lanterns
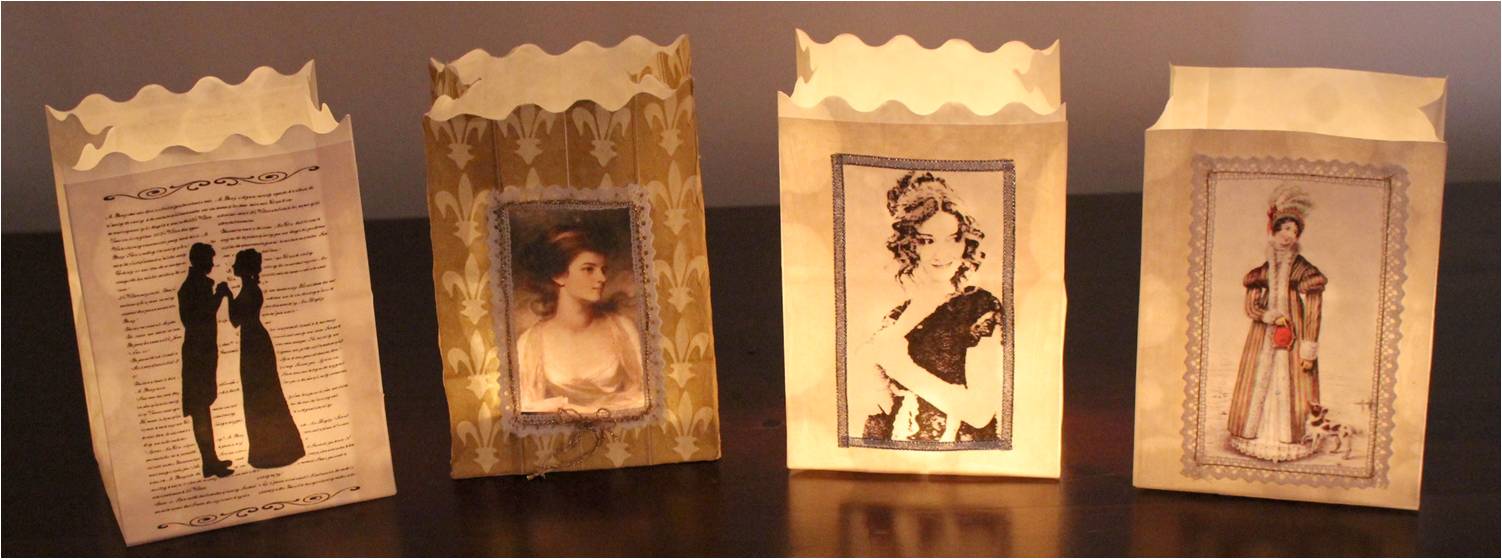
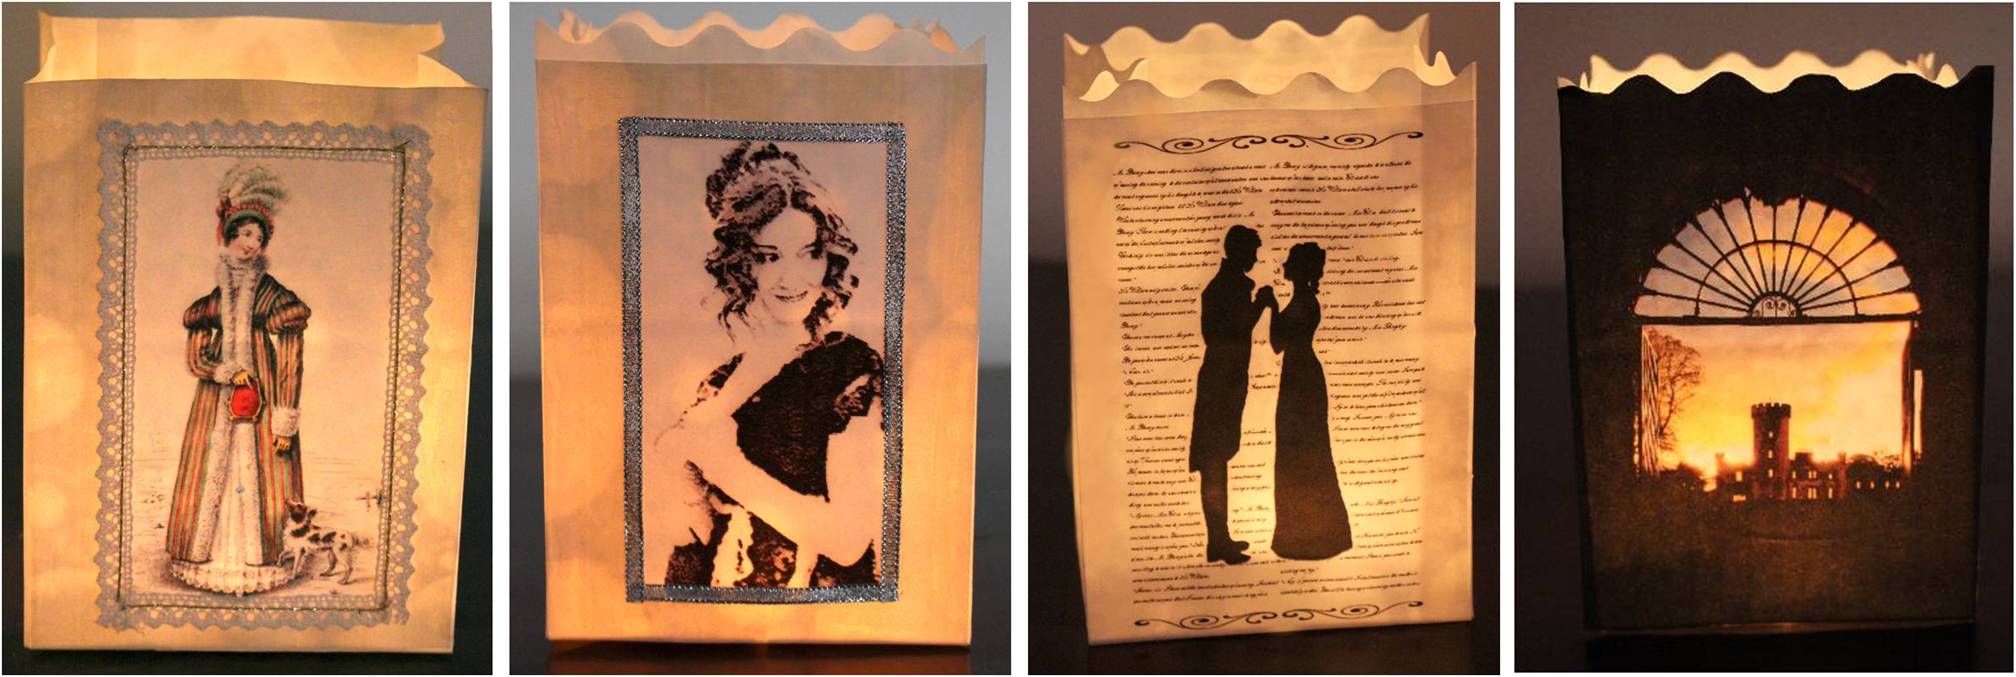
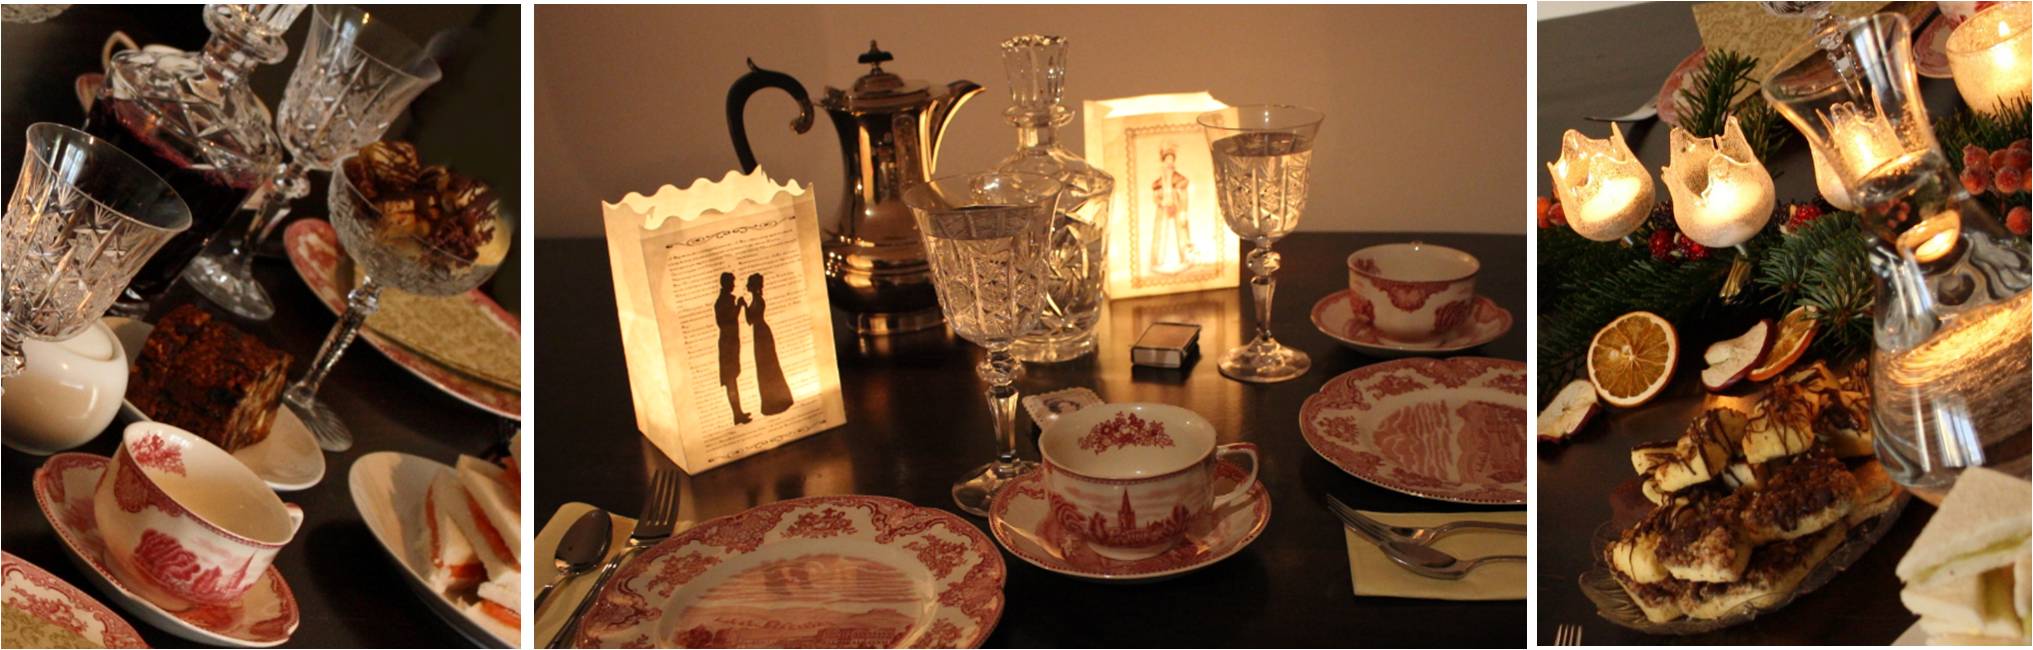
Jane Austen-inspired design
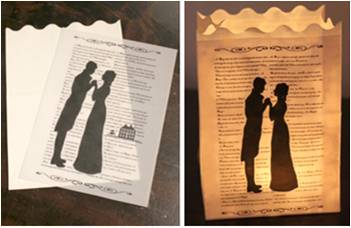
The easy way of creating paper lanterns is to simply glue the oiled picture onto the paper lantern. This method spares you a lot of trouble with glue and scissors. Besides: A simple design, e.g. a silhouette, will look great.
The design below is inspired by Jane Austen’s novel Pride and Prejudice. I used the famous ballroom scene with Mr Darcy (“Every savage can dance”) as background. The couple in the front foreshadows the happy ending.
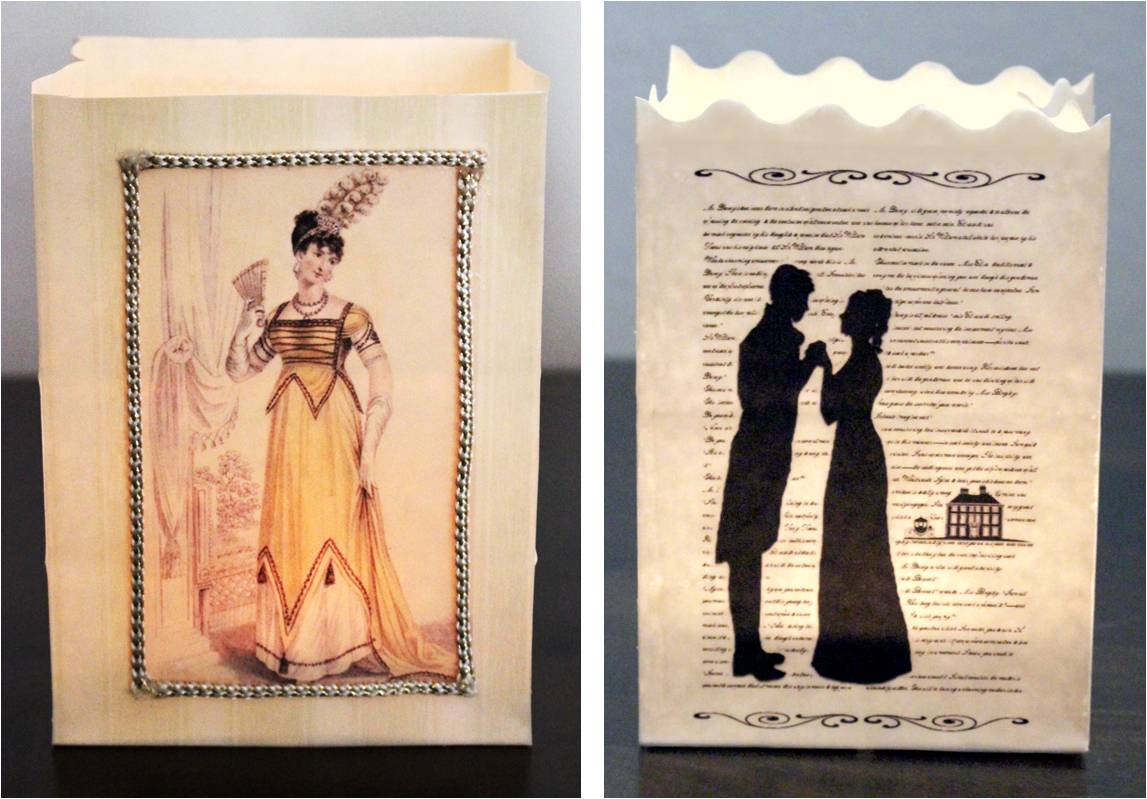
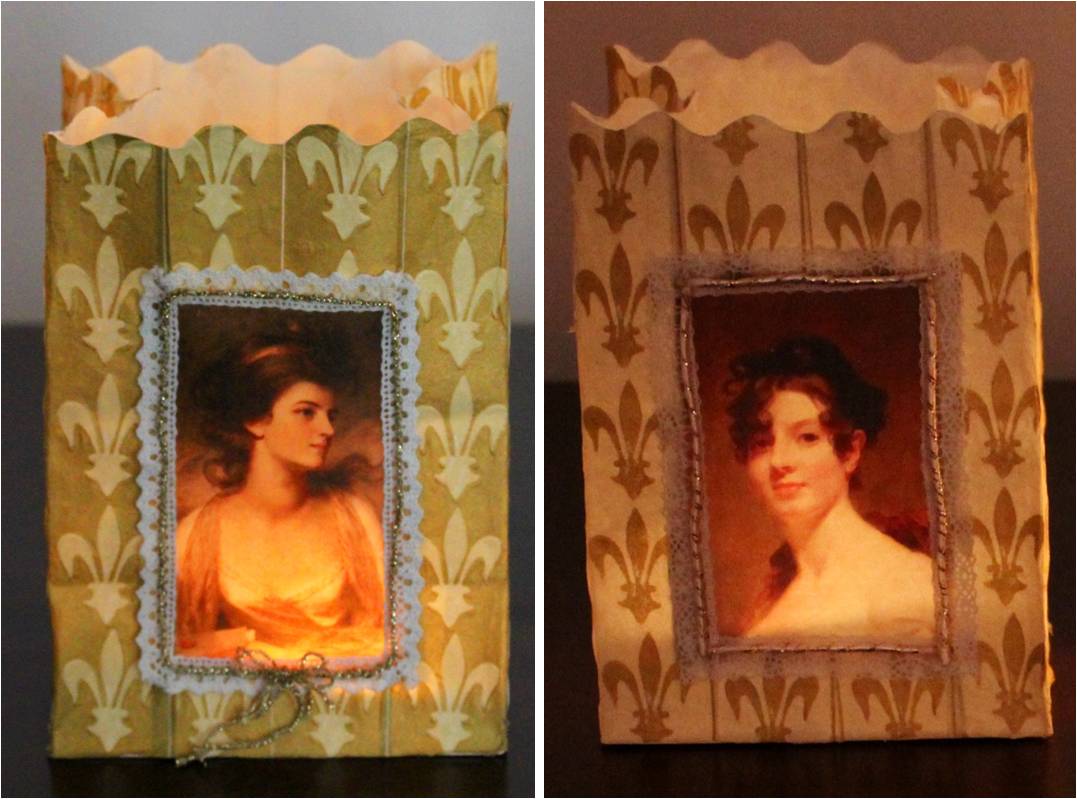
Romantic fashion-design
If you care for glamour, you can adorn the lantern with lace and ribbons.
For the version below, I chose a fashion plate of “Ackermann’s Repository“. The design of the winter dress is repeated by the lace and the gold threat glued around the picture.
Gothic design
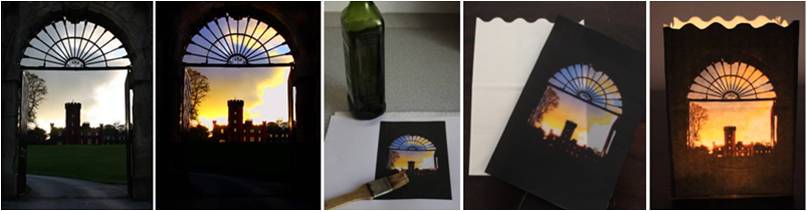
This lantern probably is closest to what people in the 18th century would have liked, when transparent scenes called “The castles of spectre” and “A moonlit shipwreck” were popular.
My picture features a British castle (now a hotel). The ground colours are dark and contrast with a few highlights.
200 years ago, the picture would have been an elaborate engraving. I simply adjusted the colours of the photo with an image editing program. After applying oil, I glued it onto the lantern – voilà, here is a spooky design appealing to today’s and 18th-century’s readers of Gothic novels alike.
French Baroque-design
For those of you who enjoy doing handicrafts, I came up with this version:
- Select a picture for the lantern
- Cut out a rectangle slightly smaller than the size of your picture from the paper lantern
- Paste the upper layer of a paper napkin on the paper lantern. Do not cover the cut-out rectangle
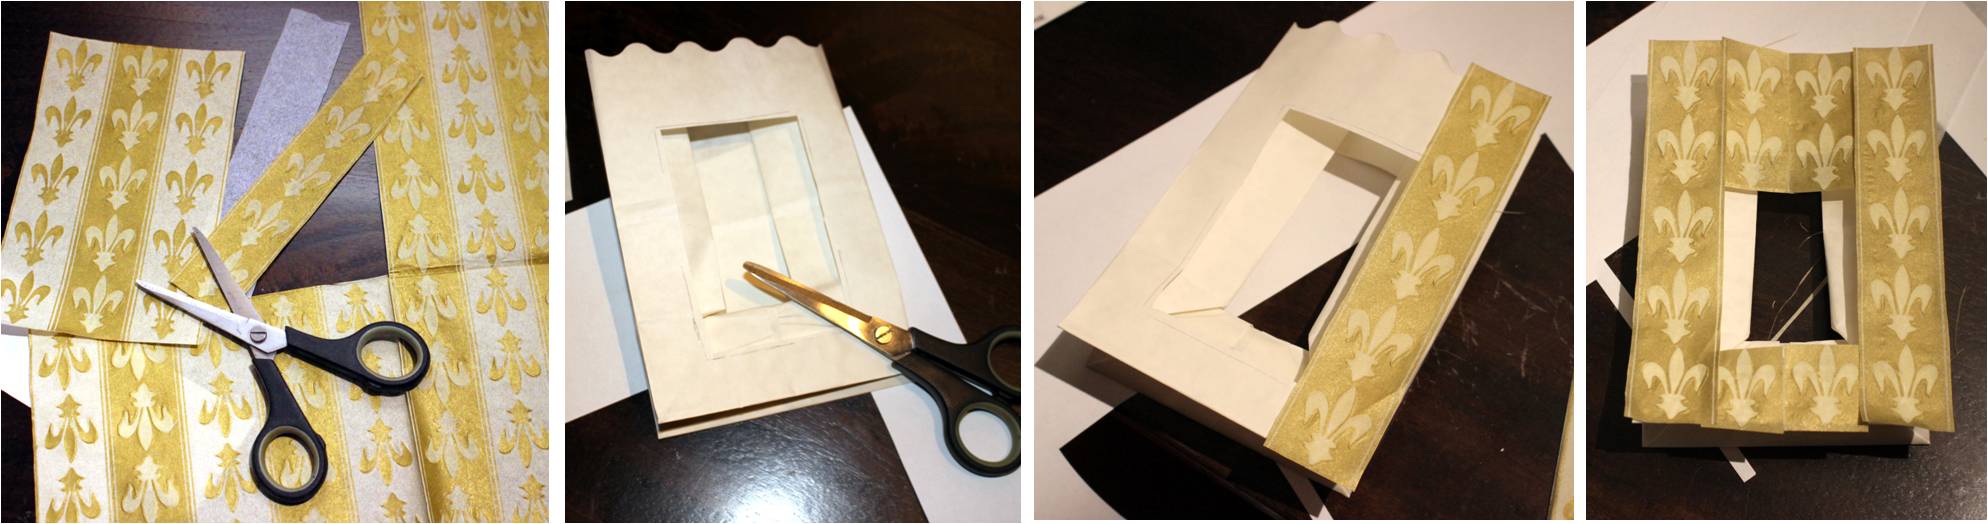
- Glue the picture in the rectangle
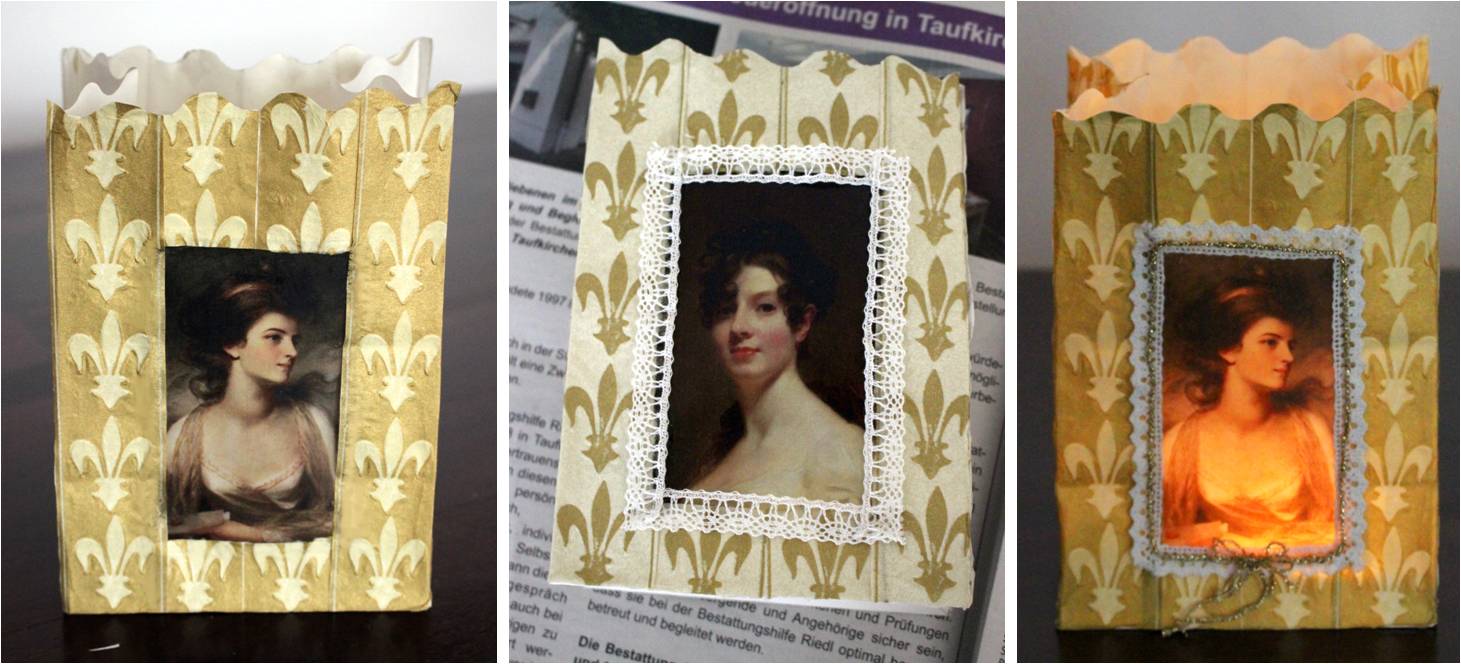
- Smooth out the creases
- Adorn the lantern with lace and ribbon. If you like, add fake gems, pearls or glitter
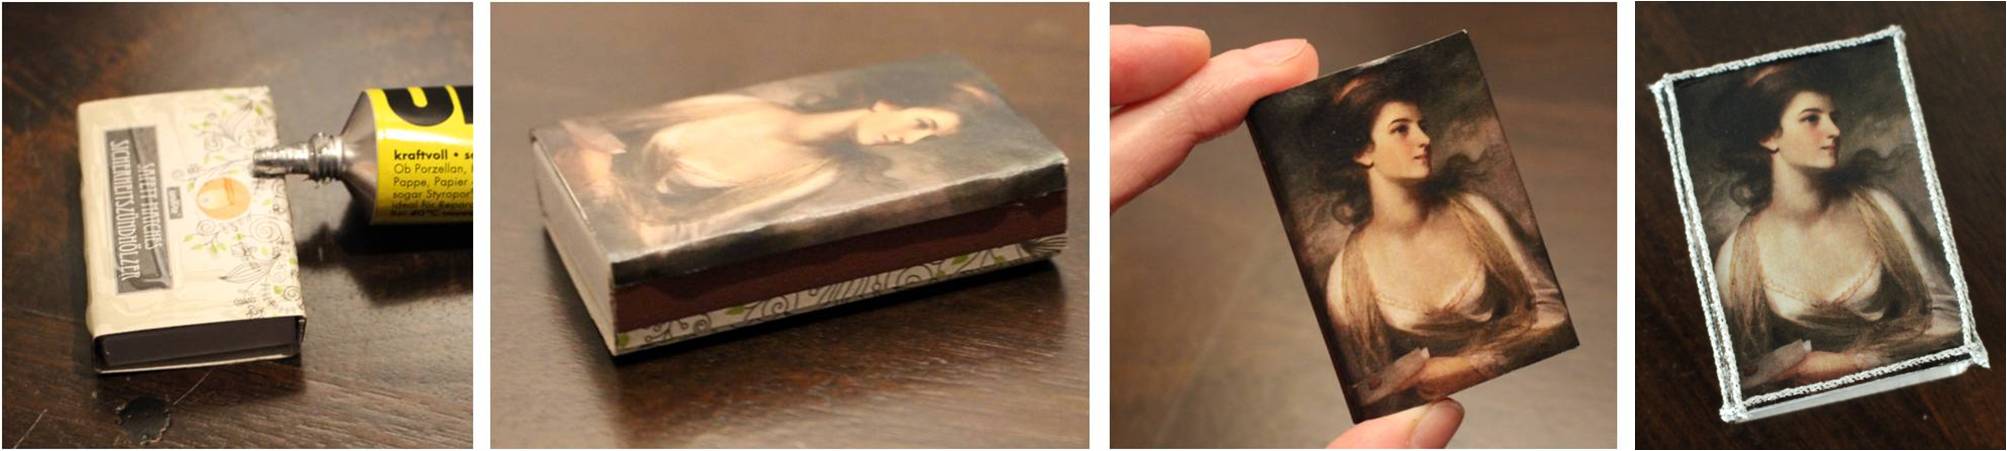
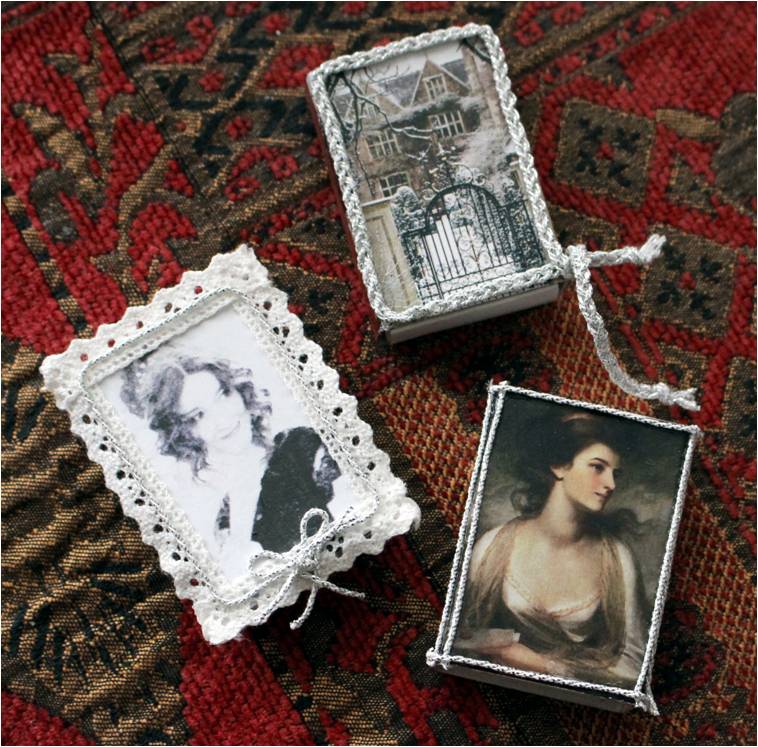
Make matching matchboxes
To lighten the lanterns in style, you can use equally lavishly designed matchboxes (even though matches weren’t yet invented in the Regency period).
This is what you need:
- matchboxes
- lace and ribbons
- pictures of your favourite historical persons and places
- glue and scissors
Glue pictures on both sides of the matchbox. Decorate the matchbox with ribbons or lace.
Gift idea: Personalised lantern and matchbox
If your friends are into re-enactment or enjoy wearing Regency attire, a personalised lantern and matchbox will surely make a lovely gift.
Christmas gallery
Here are some of my paper lanterns in Regency-design. If you feel inspired to make some yourself, feel free to send me photos of your artwork.
And now it’s time for the guests to arrive and spend a joyful evening.
Best wishes for the Festive Season
Yours
Anna M. Thane
Sources:
Plunkett, John: Light Work: Feminine Leisure and the Making of Transparencies; in: Hadjiafxendi, Kryriaki and Zakreski, Patricia (Editors): Crafting the Woman Professional in the Long Nineteenth Century; Farnham, Ashgate, 2013.